Installing Your Blackfly S
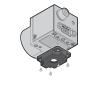
1. Install the Tripod Mounting Bracket (optional)
|
The ASA and ISO-compliant tripod mounting bracket attaches to the camera using the included screws. |
2. Attach a Lens
Unscrew the dust cap from the lens holder to install a lens.
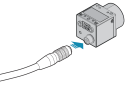
3. Connect the interface Card and Cable to the Camera

|
Plug the interface cable into the host controller card and the camera. The cable jack screws can be used for a secure connection. |
When the camera is first connected, the operating system automatically installs the camera driver. Camera drivers are available with the Spinnaker SDK installation.
- If using PoE, connect a powered Ethernet switch or Ethernet power injector in between the card and the camera.
4. Plug in the GPIO connector if required
|
GPIO can be used for power, trigger, and strobe. |
5. Confirm Successful Installation
Run the SpinView application: Start->All Programs-> Spinnaker->SpinView
The SpinView application can be used to test the camera's image acquisition capabilities.
6. Configure IP Settings if necessary
For GigE cameras by default, a dynamic IP address is assigned to the camera according to the DHCP protocol. If DHCP addressing fails, a link-local address is assigned. If necessary, in SpinView change the IP address of the camera to be on the same subnet as the NIC.
Changes to your camera's installation configuration can be made using the SpinView application.
_242x41.jpg)